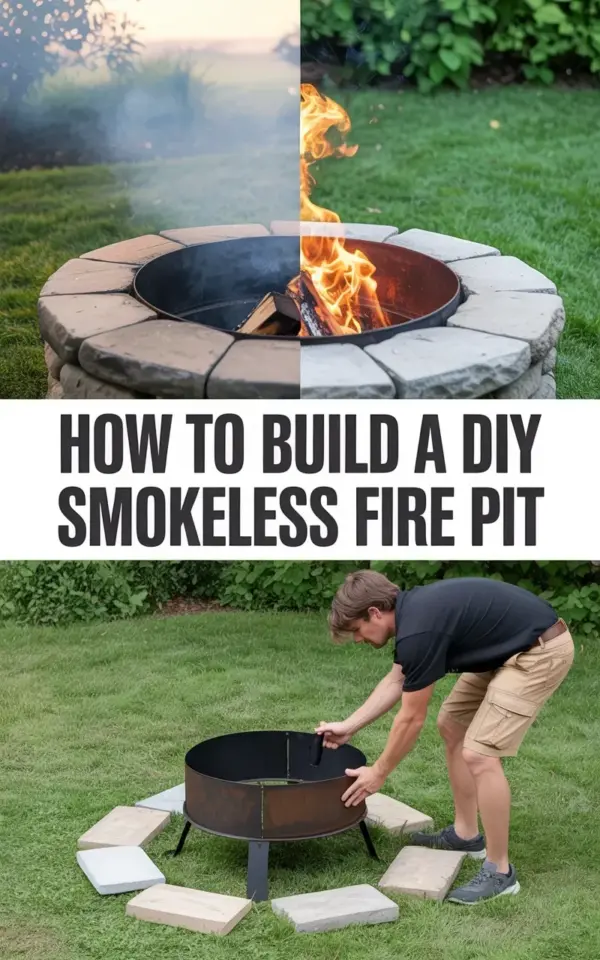
Now, that moment when your fire pit sends you running inside with stinging eyes? Yeah, you can build something better. The one you see in that famous split-screen photo, where the left side is a smoky mess and the right side burns clean? That’s not magic, it’s just good engineering. This DIY smokeless fire pit guide is built around a simple fact: you don’t need to buy a fancy prefab unit to get a smoke-free fire. You can build one with stone, for a fraction of the price, and be roasting marshmallows by Saturday night.
When people see the comparison in the photo, they usually assume it’s some expensive stainless steel insert. It’s not. It’s just a clever double-wall build that recycles the smoke until it burns off. No, you don’t need to be a master mason to pull this off. You need to be patient, have a weekend free, and be willing to haul some heavy rocks around your backyard.
The best part? This falls right into that cozy, crisp autumn vibe. Think cool evenings, warm jackets, and zero smoke following you around like a lost puppy. Let’s get into the nuts and bolts of it.
## Why A Double-Wall Build Gives You A Smoke-Free Flame
Here’s the thing about smoke: it’s just unburned fuel escaping into the night. In a regular fire pit, the fire sits in the open. There’s not enough oxygen at the top, so the wood gases don’t fully combust, and they float up and into your eyes.
A smokeless fire pit solves this by feeding the fire with pre-heated air from below. Look at the bottom half of that photo you saved. The builder is creating a gap between the inner stone ring and the outer wall. That air gap pulls oxygen down and feeds it back into the fire above the flames, reigniting the smoke.
I remember the first time I saw one of these working at a friend’s house in Vermont. I didn’t smell a single wisp of smoke the whole night. It honestly felt like a party trick. But seeing it in person convinced me that I needed one in my own yard.
It doesn’t require a complex fuel system to work. No blowers or electricity needed, just gravity and basic physics.
## What Materials And Tools You’ll Need To Start
Don’t overthink the shopping list. The most important part is that your inner wall needs to be metal. Honestly, the steel liner is doing all the heavy lifting here. The stone is for the structure and the looks, but the steel is the secret sauce.
– **A steel fire pit liner or a large steel drum** (this is your inner wall)
– **Gravel** (for the drainage base)
– **Landscape fabric** (to keep weeds from ruining your hard work)
– **Concrete adhesive or masonry glue** (for the stone)
– **Fire-resistant stone or pavers** (stay far away from river rocks, they can crack and even explode)
– **A level** (crucial, unless you want a leaning tower of fire)
– **Gloves and safety glasses** (your hands will thank you later)
Going to a salvage yard for the steel liner is a solid move. I found mine at a local scrapyard for twenty bucks. It was an old compressor tank, and I cut the top off. That was one of the best “I’m cheap and smart” days of my building life.
## Prepping Your Site And Digging The Foundation
The most critical step is still the most boring one: the base. You cannot build a heavy stone structure on soft grass. It will shift, lean, and eventually collapse in the middle of winter when you aren’t looking.
Start by clearing the area. Mark your circle, making it about a foot wider than your fire pit’s final diameter. You want a little room to stand on level ground while you build. Dig down about 8 inches. It doesn’t need to be a perfect glassy surface, but it does need to be even.
Fill that hole with gravel. Tamp it down. Like, really tamp it down. Walk on it, jump on it, jump on it while holding a beer, just compress it thoroughly. Then lay down your landscape fabric so the weeds don’t make a surprise appearance next spring.
Once that gravel is lock-solid, place your steel liner in the absolute center. This is the moment you decide if you’re building a circle or a square. Circular is easier to source stones for, so stick with that.
## Building The Stone Base And Installing Your Liner
Ok so, this is where the photo comes to life. In the bottom image of that Pinterest graphic, you can see someone carefully placing stones around the metal liner. This is the actual construction zone.
First, put down a thick bead of masonry adhesive on the gravel. Place your first layer of stones around the steel liner. Press them firmly. Use the level constantly. If the stone wobbles, chip a little gravel underneath or slide a shim in. Take your time with this bottom row, every stone above it depends on these first guys being stable.
As you work your way up, you’ll see the gap forming naturally between the outside of the liner and the inner edge of your stone wall. That’s your air channel. Keep it clear. Do not shove smaller rocks or debris in there, or you’ll kill the airflow and have a smoky pit again.
I usually build up three or four rows of stone for the base before I move on. It looks like a little well at this point. It’s a shame to cover it up, honestly, but the next step makes it work better.
## Adding The Upper Ring And The Air Intake Holes
This is the “smoke eater” phase. Most steel liners need holes drilled into them near the bottom rim. These holes let the cool outside air get sucked into the space between the stone and the steel.
Yeah, it’s a bit of a workout. You’ll need a drill with a metal bit. Mark a line about 2 inches from the top of your liner. Drill a row of holes all the way around, leaving about 3 inches between each one.
Here’s a thing I learned the hard way: if you drill the holes too high, the fire pulls too much air and burns through wood in 20 minutes. Too low, and the ashes cover the holes. You want them right at the top edge of the inner metal wall, just below the lip. That way, the smoke gets sucked right into that hot jet of air.
Now, when people look at your pit from a distance, they won’t notice the holes. They’ll just admire the neat ring of stone. But those little holes are the workhorses. They are the entire reason the right side of that comparison photo is crystal clear.
## Finishing Touches For Fall Night Ambiance
You’re almost done. Now it’s time to make this thing look like it belongs in your backyard. Cut off any excess steel liner that pokes above your stone work, or cap it with a flat decorative stone. Personally, I like leaving a bit of the metal lip visible, it gives it an industrial, homemade feel.
Seal the top row of stones with a bit of adhesive to keep them from popping loose and becoming projectiles. Not that they would ever become a projectile, but you know, safety first.
Finally, grab a bag of seasoned hardwood. Not fresh pine. Use oak, cherry, or hickory. Get it roaring, add a couple of logs, and watch the difference. In the photo they used small cut logs, which burn fast and hot. That’s a good trick for a shorter sunset fire, but use bigger rounds if you want it to last.
## A Few Safety Tips Before You Light It Up
Don’t be the neighbor who burns down their fence. Keep the pit at least 20 feet away from any structures, overhanging trees, or dry bushes. Check your local rules about open fires first, too. Some cities have straight-up burn bans.
Clear the ground around the pit of leaves and pine needles before you start. Fall leaves are basically natural gasoline. When you’re done for the night, let the wood burn down to ash completely before you leave it unattended. There’s nothing more annoying than waking up to a random whisp of smoke still coming out.
Also, don’t use rocks that look wet. Porous rocks can trap water, and when they hit the heat, they turn into mini bombs. Use dense, dry stone or kiln-fired fire brick. It’s not worth the risk of a face full of shrapnel.
Those tiny changes make the difference between a good fall night and a trip to urgent care. And as always, keep a bucket of water or a garden hose nearby. You’ll probably never need it, but the peace of mind is worth it.
I hope this inspires you to take on the build. It’s one of those weekend projects that pays you back all winter long (or at least for those crisp fall weeks). Save that pin, grab your gloves, and get out there. There’s nothing like sitting beside a fire that behaves exactly how you want it to.
Leave a Comment