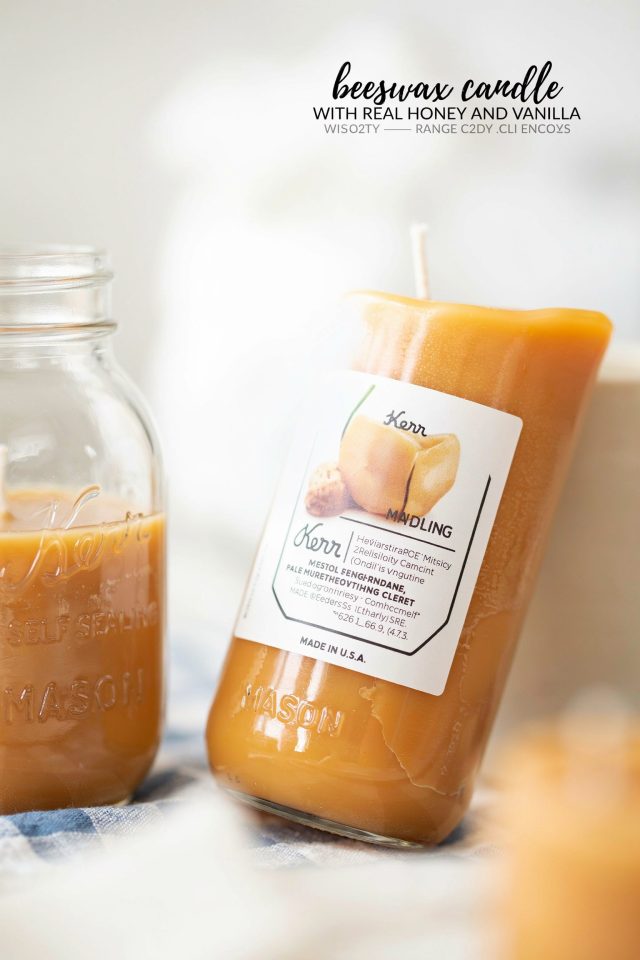
I have been making my own candles for years, but this honey vanilla candle recipe is the one that gets the most compliments every single time. There is something about the warm, sweet combination of real honey and pure vanilla that makes a space feel instantly more cozy. If you have ever wanted to try a homemade beeswax candle but felt unsure where to start, this guide is for you. I will walk you through every step, from choosing the right wax to getting that perfect scent throw without any synthetic fragrances. Let us make your home smell like a warm bakery, naturally.
Why choose beeswax for your honey vanilla candle?
Most store bought candles are made from paraffin wax, which is a petroleum byproduct. When you burn them, they can release chemicals into the air. Beeswax, on the other hand, is a completely natural substance produced by honeybees. It burns cleaner and longer than almost any other wax I have tried. Plus, it has a faint honey scent all on its own, which pairs beautifully with the vanilla and extra honey we will add.
Another reason I stick with beeswax is that it actually helps purify the air. Beeswax releases negative ions when it burns, which can bind to dust, pollen, and other airborne particles and pull them out of the air. That is a huge bonus for anyone who deals with allergies or just wants to breathe a little easier. And because beeswax burns at a higher temperature, your candle will last much longer than a soy or paraffin candle of the same size.
The only drawback is that beeswax is a bit harder to work with than softer waxes. It has a higher melting point and can be tricky to pour if you are not careful. But with a few simple tips, you will have a solid, gorgeous candle that looks as good as it smells.
Gathering your ingredients for this DIY scented candle
Before you start melting anything, take a few minutes to gather your supplies. The quality of your ingredients directly affects how your candle turns out, so do not skimp on the basics. Here is exactly what I use for this honey vanilla candle recipe:
- 1 pound of pure beeswax pellets or blocks. I prefer pellets because they melt faster and more evenly. Make sure it is 100% beeswax, not a blend.
- 2 tablespoons of raw honey. Use the real stuff, not processed honey. The flavor will not come through in the candle, but the natural sugars add a subtle touch and help the scent stick.
- 1 teaspoon of pure vanilla extract. Yes, the kind you bake with. It gives that deep, rich vanilla note that artificial oils cannot replicate.
- 40 to 50 drops of vanilla essential oil. This boosts the vanilla scent so it actually fills a room. You can also use a vanilla blend or a drop of cinnamon for extra warmth.
- 10 drops of sweet orange essential oil (optional). I like adding a tiny bit of orange to brighten the honey note. It is not necessary, but it makes the scent more complex.
- A candle wick. Use a cotton wick that is sized for your container. Beeswax needs a thicker wick than soy because it burns hotter.
- A heatproof container. Mason jars, tin cans, or ceramic vessels all work. Just make sure it can handle high heat.
- A double boiler or a makeshift one. I use a glass measuring cup set in a saucepan of simmering water. Never melt beeswax directly on the burner.
- A wooden skewer or chopstick for stirring and a pot holder or tongs for handling hot glass.
Lay everything out on a protected surface. Wax drips can be a pain to clean off counters, so I always put down newspaper or a silicone mat.
Step by step instructions for your homemade beeswax candle
Once you have your ingredients ready, the actual process is pretty straightforward. Take your time and do not rush the melting stage. Beeswax can scorch if you get it too hot, and that will ruin the scent. Here is my exact method:
First, set up your double boiler. Fill a small saucepan with an inch or two of water and bring it to a gentle simmer. Place your beeswax pellets in a heatproof glass measuring cup or a metal pouring pitcher, then set that in the water. Stir occasionally with a wooden skewer as the wax melts. This takes about 10 to 15 minutes for a full pound.
While the wax is melting, prepare your container. Stick the wick to the bottom using a dab of melted wax or a glue dot designed for candles. Then use a skewer or a wick holder to keep the wick centered and upright. You can also wrap the top of the wick around a pencil laid across the rim of the container.
Once the wax is fully liquid and clear (no lumps), remove it from the heat carefully. Let it cool for two to three minutes, then stir in the raw honey. The honey will not dissolve completely, and that is fine. Just whisk it in with your skewer until it is evenly dispersed. Then add the vanilla extract and the essential oils. Stir gently but thoroughly. The smell at this point is incredible.
Pour the melted wax into your prepared container, leaving about half an inch of space at the top. Beeswax shrinks as it cools, so you might see a small sinkhole form around the wick later. That is normal and easy to fix with a second pour. Let the candle sit undisturbed for at least six hours, preferably overnight, before you touch it.
If you do end up with a dip around the wick, simply save a little leftover wax in the pot, reheat it, and pour a thin layer over the top to level it out. That second pour trick makes your finished candle look professionally made.
Tips for adding honey and vanilla essential oils
Getting the scent balance right is where most people get nervous. You do not want the candle to smell like fake vanilla or burnt honey. The key is using a combination of natural extracts and high quality essential oils. Pure vanilla extract is alcohol based, so some of that alcohol will burn off during the candle making process. That is why I always add extra vanilla essential oil as a booster.
Raw honey adds a tiny bit of moisture to the wax, which can affect how the candle burns. I have found that two tablespoons per pound of wax is the sweet spot. Any more and the honey can make the candle smoke or cause the flame to gutter. Less than that and you will not notice the honey note at all. Also, warm the honey slightly before adding it to the melted wax. Cold honey will seize the wax and create clumps.
If you want a stronger vanilla scent, try using a vanilla oleoresin instead of vanilla essential oil. Oleoresin is thicker and more concentrated, but it can make the wax slightly darker. That actually looks nice with beeswax, giving it a warm amber color. Just remember to stir it in thoroughly so it does not settle at the bottom of the container.
One more tip: always test your scent strength on a small batch first. Melt a quarter pound of wax, add your oils and honey, and pour it into a tiny jar. Let it cure for 24 hours, then burn it in a small room. If the scent is too faint, double the essential oil next time. If it is overwhelming, cut back by half. Everyone noses are different, and your personal preference matters more than any recipe.
How to get the perfect candle wick and container
I have ruined plenty of candles by using the wrong wick. Beeswax burns hotter than soy wax, so a thin wick will drown in the melted wax pool and eventually go out. A wick that is too thick will create a huge, sooty flame that burns the candle down in two hours. For a standard 8 ounce mason jar, I use a cotton wick that is about 0.5 inches wide. For wider containers like a 12 ounce tin, go up to a 0.75 inch wick.
Another thing to watch is the wick tab. Make sure the wick is pre tabbed with a metal base that sits flat on the bottom of your container. If you buy wick on a roll, you will need to attach a tab yourself. That is easy, just crimp the wick into the tab with pliers. Then secure the tab to the container with a dab of hot glue or melted wax.
For the container itself, avoid anything that is not heat safe. Thin glass like a wine bottle can shatter. Stoneware, ceramic mugs, and thick canning jars are all good choices. I also love using small metal tins for travel candles. They are cheap, light, and they fit perfectly in a drawer or on a nightstand.
Do not forget to leave that half inch of headspace at the top of the container. If you fill it all the way to the rim, the wax will overflow when it is lit and hot. That is messy and a safety hazard. Also, never pour wax into a cold container. Warm the jar slightly with a hair dryer or by setting it in the oven at 150°F for a few minutes. A warm container prevents the wax from cooling too fast and cracking.
Troubleshooting common beeswax candle issues
Even experienced candle makers run into problems sometimes. Here are the most common ones I have dealt with and how to fix them. If your candle forms deep cracks or large air pockets around the wick after cooling, that is caused by the wax shrinking too fast. The solution is to pour the wax at a lower temperature, around 150°F instead of boiling hot. Also, do not put your candle in the refrigerator to speed up cooling. Let it cool slowly at room temperature.
If the surface of your finished candle looks lumpy or frosted, that is usually because the wax was too hot when poured, or the room was drafty. Beeswax naturally develops a bloom, a powdery white coating, over time. That is not a flaw, it is a sign of pure beeswax. You can buff it off with a soft cloth if you prefer a shiny look, but I kind of like the rustic texture.
Sometimes the candle will tunnel, meaning it burns only down the center and leaves a thick wall of wax around the sides. This happens when the wick is too small for the container. The first burn is critical. Let the candle burn until the entire top layer of wax is liquid, all the way to the edges. That can take two or three hours for a wide jar. If you blow it out too early, you will get tunneling every time.
If you notice black soot on the jar, your wick is too long. Trim it to a quarter inch before every lighting. That also keeps the flame from getting too big and reduces smoke. Another cause of soot is using too much honey or vanilla extract. Burn off the excess moisture by letting the candle cure for a full 48 hours before lighting it the first time.
Making your honey vanilla candle part of aromatic home decor
Once your candle is finished, you will want to show it off. Beeswax candles have a natural golden color that looks beautiful in simple glass jars. I like to tie a piece of twine around the neck of the jar and attach a small tag with the burn time and ingredients. That makes a nice gift, too. If you want to get creative, pour the wax into a vintage teacup or a small ramekin for a unique look.
Place your honey vanilla candle in a room where you spend a lot of time winding down. The living room, the bedroom, or even a home office works well. Because the scent is sweet but not heavy, it does not clash with other smells like coffee or fresh air. Light it during a quiet evening with a book, or when you have guests over for a relaxed dinner.
You can also make a set of these candles for different corners of your home. Keep one in the bathroom for a spa like feel. The combination of honey and vanilla is calming and pairs nicely with a warm bath. Just make sure the candle is on a heatproof surface away from curtains or towels. Safety always comes first, no matter how pretty the candle looks.
If you want to switch things up, try adding a pinch of dried lavender or a small cinnamon stick to the wax before pouring. That gives the candle a more seasonal vibe. But for the classic honey vanilla candle recipe, I keep it simple. The raw ingredients speak for themselves.
Making your own candles is one of those small skills that brings a lot of satisfaction. You control exactly what goes into the wax, you avoid synthetic chemicals, and you end up with a product that smells like real honey and vanilla, not a cheap imitation. Plus, it is surprisingly cheap once you have the initial supplies. A pound of beeswax can make two or three good sized candles for a fraction of what you would pay at a boutique.
If you try this honey vanilla candle recipe, I would love to know how it turns out for you. Tag a photo or leave a comment with your own twist on the ingredients. Happy candle making.
#honeyvanillacandle #diyscentedcandles #beeswaxcandles #naturalhomefragrance #aromatichome
Leave a Comment