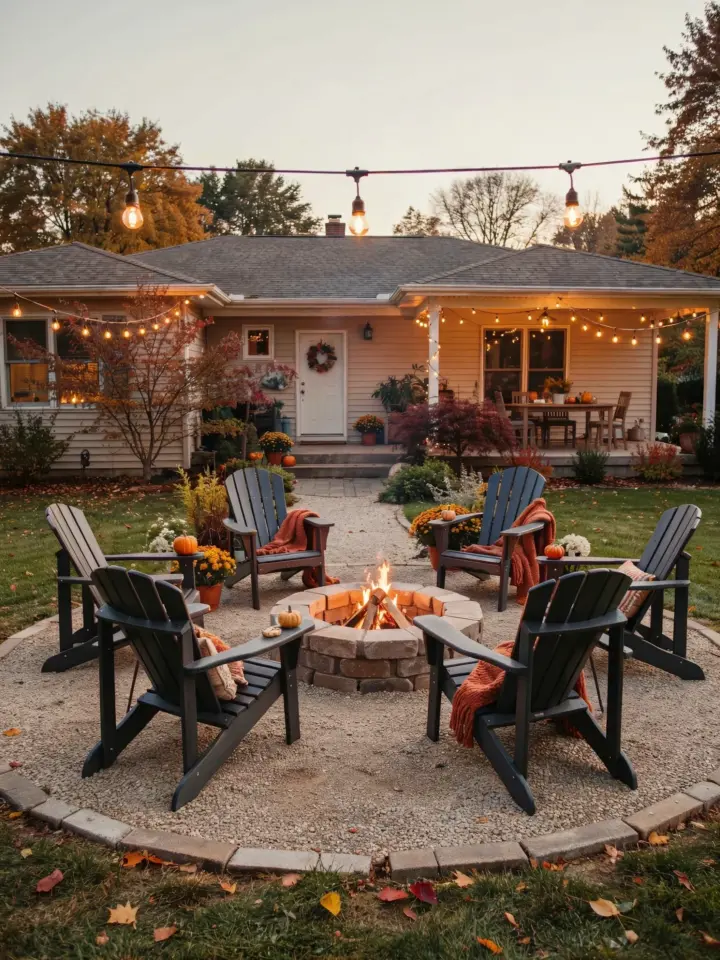
Saturday morning, 9 a.m., and I was staring at a pallet of gravel in the Home Depot parking lot with no idea how many bags we actually needed. My husband had texted me a photo of a fire pit he liked, but the price tag said $900. I told him we could build the same thing for under $150. That’s how this backyard gravel fire pit started, and honestly, it turned out better than the expensive version.
How to choose the right spot for your backyard fire pit
Location matters more than the materials. We walked around our yard for twenty minutes with a garden hose, laying it in a circle to imagine different spots. The winning spot ended up being about fifteen feet from the patio door, far enough that smoke wouldn’t pour inside, close enough that carrying snacks isn’t a whole trek.
Check local rules first. Some municipalities have setbacks from fences and structures, usually 10 to 15 feet. Also call your utility company to mark buried lines, a step people skip until they hit a gas line. Not fun.
Paver edging and gravel: what actually works for a drainable base
Here’s the thing, you don’t need a solid concrete slab for a fire pit. Rainwater needs to escape somewhere. A gravel base drains beautifully, which means your fire ring stays dry instead of sitting in a muddy puddle after a storm.
We used plastic paver edging from the hardware store, the kind with spikes that you hammer into the ground. It’s cheap, flexible, and you can curve it into a perfect circle. For the gravel, we picked crushed limestone fines because they pack down harder than round pebbles. Ask for “base rock” or “crusher run” at the yard, and tell them it’s for a fire pit base.
- Paver edging kit, about $25
- Crushed limestone, about $40
- Steel fire ring, about $60 on sale
Steel fire ring options without the fancy price tag
You can buy a pre-made fire ring from a big box store for $150, but those are thin and rust out in a couple of seasons. We found a heavy-duty steel ring at a farm supply store, meant for livestock troughs, weirdly. It’s about a quarter-inch thick and will outlive us.
Another option is to call a local metal fabricator and ask if they have cutoffs. We got a quote for $75 for a custom ring. The one we bought was on clearance because the powder coating was scratched, which didn’t matter at all once we set it in gravel. Look, scratches on a fire pit are going to happen anyway.
Step by step: installing a gravel fire pit in one afternoon
We cleared the grass with a flat shovel, just cutting down about two inches deep in a circle. The paver edging gives the pit a clean border, so you don’t have to be surgical with the digging. Then we laid the edging in a circle and hammered the spikes in with a rubber mallet.
This next part is important to get right. You need to level the ground inside the circle, otherwise your fire ring will wobble. We used a tamper (a rented plate compactor is overkill for a small area) and then dumped in the gravel little by little. Spread, spray with water, tamp, repeat. If you skip the tamping, the gravel settles unevenly later.
And then the easiest step of all: drop the steel ring in the middle and press it down until it seats into the gravel. Done.
Why a gravel base beats a concrete slab every time
Concrete cracks. Concrete heaves in winter if water gets underneath. And concrete is permanent, which is great if you love your fire pit location forever, but what if you want to move it in two years?
Gravel gives you freedom. If the wind always blows smoke into your seating area, you can disassemble the whole pit in thirty minutes and rebuild it somewhere else. Also, water drains right through the gravel, so you won’t see puddles or weeds popping up around the edges. The paver edging keeps the gravel contained, but those little gaps still let moisture out.
Our actual costs and where you can cut corners
Our total came to $137, including the gravel, edging, steel ring, and a new box of rubber mallet rage because my husband lost the first one. We already had the shovel and level, but if you’re borrowing those from a neighbor, that’s fine.
If you need to spend less, here’s the thing: skip the paver edging entirely and just dig a shallow trench, then fill it with gravel. The edging is mostly for looks. You can also find scrap steel online or via local Facebook marketplace. One guy in our town sold a rusted fire ring for $20, and after a wire brush and some high-temp paint, it looked brand new. The fire ring is the only non-negotiable piece, because a metal ring keeps the fire contained and makes the whole pit function properly.
What we’d do differently next time
We made the circle too big at first, about six feet across, and it swallowed the space. We ended up pulling out the edging and shrinking it to four feet. That’s the beauty of this build. Nothing is permanent. You want the fire ring to be roughly a foot away from the edge of the gravel, so you have room for feet and a couple of folding chairs without feeling cramped.
Also, buy more gravel than you think you need. We underestimated by two bags and made a second run to the store in the middle of assembly. And pay attention to the ground slope before you start. Our yard has a slight grade, and we had to add extra gravel on one side to level the ring. That’s fine, just don’t ignore it like we almost did.
That’s the whole build. An hour of digging, a little tamping, and we’ve had this fire pit all summer. It’s become the spot where we make s’mores, burn old homework (just kidding, sort of), and sit out with coffee on crisp mornings. If your patio feels incomplete and you’ve been staring at $400 fire pit kits, try this gravel version. I promise it’s the easiest DIY we’ve done, and your wallet will thank you. Now go clear a spot in your backyard.
Leave a Comment